XDDD I felt the urge to post a tutorial made 由 me on this spot XDDDD (way to boast :P). WARNING, there are a lot of settings to put on. so 你 could die of boredom!!BTW, for this tut 你 might have at least some knowledges on how to use PS, otherwise it would look terribly hard :) .
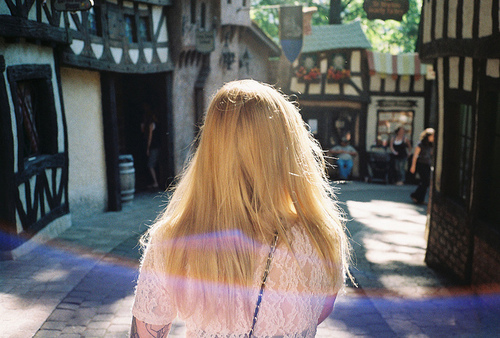
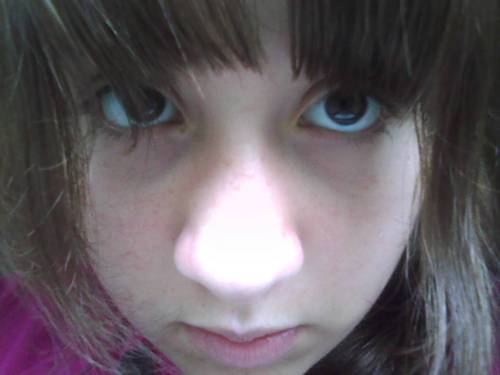
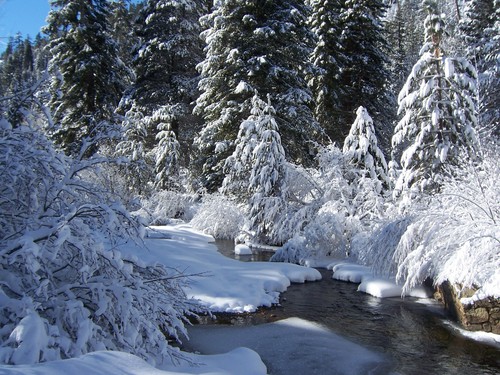
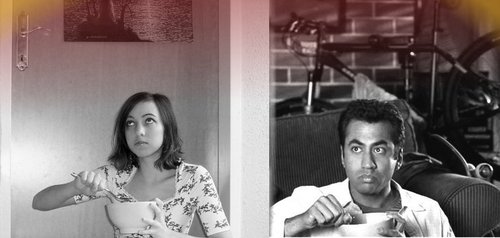
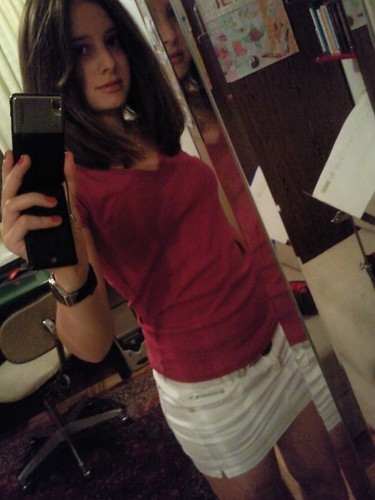
We'll be making this  from this.
Ok
1st: crop your base.This isnt an essential thing to do:you can either crop it in the start 或者 in the end, its your own choice.But for this, I decided to crop it now.
I decided to make it clearer. So I went to Filter >Noise > Reduse Noise and set these settings:
STRENGHT: 10
PRESERVE DETAILS:12
REDUCE COLOR NOISE:25
SHARPEN DETAILS:27
It looks good, but now I cant really see the edges as clear as I want them to be.So I go to Filter >Sharpen >Unsharp Mask and set:
AMOUNT: 42
RADIUS: 9,9
THRESHOLD: 0
AAAH, Now I t looks as I wanted it to be!
We're gonna make a (lovely) Curves layer with these settings:
RGB:1st point...Output 140-Input 48
2nd point...Output 197-Input 146
RED:1st point...Output 85-Input 99
2nd point...Output 122-Input 145
GREEN:1st point...Output 121-Input 105
2nd point...Output 153-Input 129
BLUE:1st point...Output 129-Input 115
2nd point...Output 159-Input 156
Dude, that was a hard work! Well, it was worth it: now our image looks brighter and a bit washed out.But now we want to add a bit of color and light.So we open a Channel Mixer layer and put these settings:
(output channel)RED:
+111
-16
+7
(output channel)GREEN:
+5
+96
0
(output channel)BLUE:
+2
-12
+113
TADAAAA! Doesnt it look a bit better now? But Im not satisfied yet (Im complicated, I know ;]).
So, for 你 own happiness, we open another Curves layer *waits for people to throw vegetables at her*
Here the settings:
RGB:1st point... Output 84-Input 106
2nd point...Output 139-Input 146
RED:1st point...Output 140-Input 142
2nd point...Output 122-Input 129
GREEN:1st point...Output 107-Input 114
2nd point...Output 154-Input 158
BLUE:1st point...Output 142-Input 129
2nd point...Output 131-Input 89
AND WE'RE DONE!! XDDD But only with the Curves layer MUHAUHAUHA!!!With this layer, I made the image look darker in all the right places, and now , the red on the 墙 looks better than before.
Time for a Colo Balance layer!!
Midtones :+5 | -5 | -12
Shadows :0 | +2 | -6
Highlights: -10 | -13 | +12
Make sure the "Preserve Luminosity" little box is checked :)Also, set it at Color Dodge, opacity 17%
Brighter, uh?
I dunno why, but now I want it to look "warmer" so I add a "Sepia" 照片 Filter. It looks like she got a bit of color on her (pretty, pretyy, PRETTY) face :) The pic looks nicer, but I still see it as if it is uncompleted and boring. So what to do?A Selective Colors layer, of course!
REDS: -100 | -18 | +100 | 0
YELLOWS: + 98 | -6 | -100 | 0
GREENS: +28 | -21 | -12 | 0
CYANS: +26 | +20 | -17 | +15
BLUES: +36 | -25 | -17 | 0
NEUTRALS: +17 | -10 | -17 | 0
Set this layer to Color Burn, opacity 30%
It darkens the picture a bit.
Now dublicate your base, bring it on the 最佳, 返回页首 all your layers and set it to Soft Light 20%
Again, we made our picture darker, but in all the right places .:):)
Another Selective Colors layer!
REDS: -100 | +20 | +30 | 0
YELLOWS : -15 | 0 | +15 | 0
WHITES : -5 | +20 | +15 | 0
NEUTRALS : +20 | +10 | +15 | -25
It looks brighter, and the reds look stronger. Be sure to set the opacity of the layer to 65% !
Before we're done, we need to make one last layer ! (I know, Im evil MUHAUHUHA)
So make a new Color Balance layer :
Midtones : -20 | +15 | -20
Shadows : -95 | -15 | +55
Highlights : -5 | -10 | 0
Again, check if the "Preserve Luminosity" little box is checked.Set this layer to Soft Light 30% (add text , textures and brushes if 你 want )and...
TADAAAAAAA!! We're done!!! This my tutorial, but on these bases, 你 can create your own! Its funny to see the outcome of what 你 try to make!! xD
Please, 评论 and let me see what 你 got from this tut! (This should work on every pic , cause I tried it on other 图片 ;])
Sorry for any spelling mistake, but Im too tired and too lazy to re-read it :D
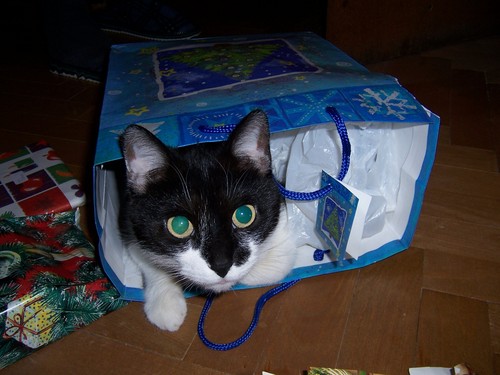
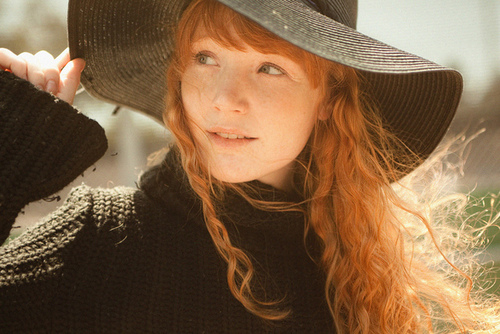
We'll be making this

Ok
1st: crop your base.This isnt an essential thing to do:you can either crop it in the start 或者 in the end, its your own choice.But for this, I decided to crop it now.
I decided to make it clearer. So I went to Filter >Noise > Reduse Noise and set these settings:
STRENGHT: 10
PRESERVE DETAILS:12
REDUCE COLOR NOISE:25
SHARPEN DETAILS:27
It looks good, but now I cant really see the edges as clear as I want them to be.So I go to Filter >Sharpen >Unsharp Mask and set:
AMOUNT: 42
RADIUS: 9,9
THRESHOLD: 0
AAAH, Now I t looks as I wanted it to be!
We're gonna make a (lovely) Curves layer with these settings:
RGB:1st point...Output 140-Input 48
2nd point...Output 197-Input 146
RED:1st point...Output 85-Input 99
2nd point...Output 122-Input 145
GREEN:1st point...Output 121-Input 105
2nd point...Output 153-Input 129
BLUE:1st point...Output 129-Input 115
2nd point...Output 159-Input 156
Dude, that was a hard work! Well, it was worth it: now our image looks brighter and a bit washed out.But now we want to add a bit of color and light.So we open a Channel Mixer layer and put these settings:
(output channel)RED:
+111
-16
+7
(output channel)GREEN:
+5
+96
0
(output channel)BLUE:
+2
-12
+113
TADAAAA! Doesnt it look a bit better now? But Im not satisfied yet (Im complicated, I know ;]).
So, for 你 own happiness, we open another Curves layer *waits for people to throw vegetables at her*
Here the settings:
RGB:1st point... Output 84-Input 106
2nd point...Output 139-Input 146
RED:1st point...Output 140-Input 142
2nd point...Output 122-Input 129
GREEN:1st point...Output 107-Input 114
2nd point...Output 154-Input 158
BLUE:1st point...Output 142-Input 129
2nd point...Output 131-Input 89
AND WE'RE DONE!! XDDD But only with the Curves layer MUHAUHAUHA!!!With this layer, I made the image look darker in all the right places, and now , the red on the 墙 looks better than before.
Time for a Colo Balance layer!!
Midtones :+5 | -5 | -12
Shadows :0 | +2 | -6
Highlights: -10 | -13 | +12
Make sure the "Preserve Luminosity" little box is checked :)Also, set it at Color Dodge, opacity 17%
Brighter, uh?
I dunno why, but now I want it to look "warmer" so I add a "Sepia" 照片 Filter. It looks like she got a bit of color on her (pretty, pretyy, PRETTY) face :) The pic looks nicer, but I still see it as if it is uncompleted and boring. So what to do?A Selective Colors layer, of course!
REDS: -100 | -18 | +100 | 0
YELLOWS: + 98 | -6 | -100 | 0
GREENS: +28 | -21 | -12 | 0
CYANS: +26 | +20 | -17 | +15
BLUES: +36 | -25 | -17 | 0
NEUTRALS: +17 | -10 | -17 | 0
Set this layer to Color Burn, opacity 30%
It darkens the picture a bit.
Now dublicate your base, bring it on the 最佳, 返回页首 all your layers and set it to Soft Light 20%
Again, we made our picture darker, but in all the right places .:):)
Another Selective Colors layer!
REDS: -100 | +20 | +30 | 0
YELLOWS : -15 | 0 | +15 | 0
WHITES : -5 | +20 | +15 | 0
NEUTRALS : +20 | +10 | +15 | -25
It looks brighter, and the reds look stronger. Be sure to set the opacity of the layer to 65% !
Before we're done, we need to make one last layer ! (I know, Im evil MUHAUHUHA)
So make a new Color Balance layer :
Midtones : -20 | +15 | -20
Shadows : -95 | -15 | +55
Highlights : -5 | -10 | 0
Again, check if the "Preserve Luminosity" little box is checked.Set this layer to Soft Light 30% (add text , textures and brushes if 你 want )and...
TADAAAAAAA!! We're done!!! This my tutorial, but on these bases, 你 can create your own! Its funny to see the outcome of what 你 try to make!! xD
Please, 评论 and let me see what 你 got from this tut! (This should work on every pic , cause I tried it on other 图片 ;])
Sorry for any spelling mistake, but Im too tired and too lazy to re-read it :D